> For the complete documentation index, see [llms.txt](https://docs.labii.com/llms.txt). Markdown versions of documentation pages are available by appending `.md` to page URLs; this page is available as [Markdown](https://docs.labii.com/applications/process-management/email-follow-up-process-in-crm.md).
# Email follow up process in CRM
### Overview
Labii Process Management is a comprehensive solution that empowers businesses to efficiently design, automate, and streamline their workflow processes. It offers a user-friendly interface for creating, executing, and monitoring processes, enhancing operational efficiency, and ensuring seamless collaboration within organizations.
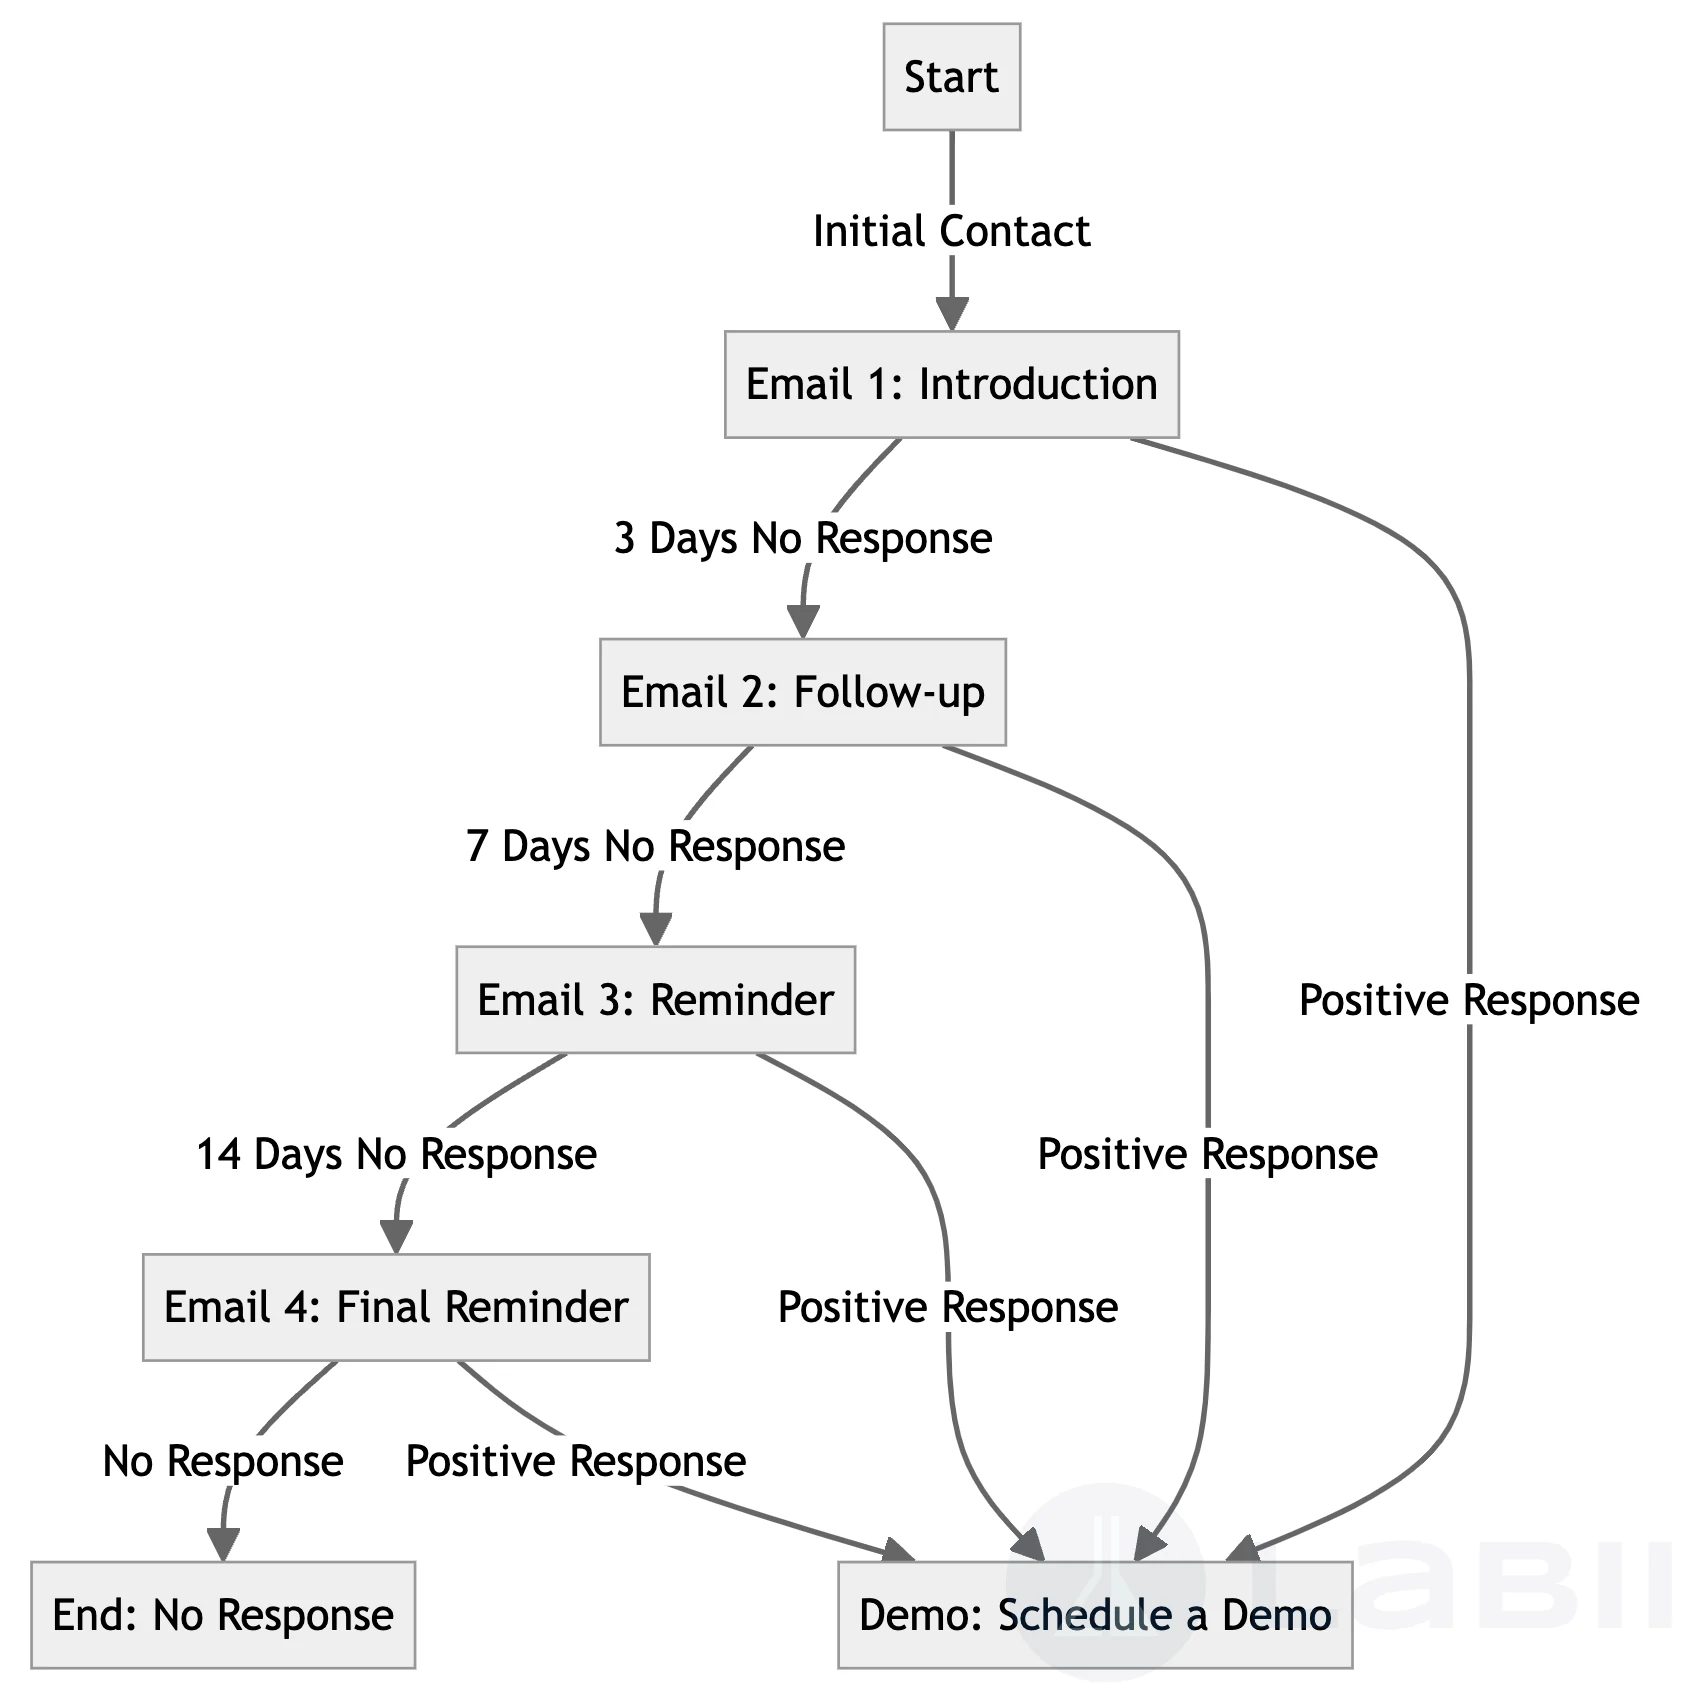
This guide will walk you through setting up automatic follow-up emails in Labii CRM, streamlining your communication process with your contacts.
### Before You Start
Before you begin, please ensure you have Labii CRM installed and have already added at least one account and one contact to your CRM.
### Step 1: Adding a Flowchart Widget to the Contact
Follow-up emails revolve around the contact, so it's recommended to add the email follow-up process to the contact. Here's how you can do it:
1. Click on "Add Section."
2. Select the "[Flowchart](/widgets/section-widgets/process-management/flowchart.md)" widget to create a new section. You can name this section "Follow-up Emails."
### Step 2: Adding the First Email
Once you've added the "Follow-up Emails" section, you can start by adding the first email. Here are the steps:
1. Click the "Add Step" button.
2. Fill in the following values:
* **Name**: First Email
* **Description**: Send the first follow-up email after adding the lead
* **Action**:
* **Name**: Send
* **Icon**: Email
* **Action**: Open Link
* **Parameters**: \[Your email sending link]
* If you're new to Labii or lack coding experience, you can use the Email Template widget to create the link easily. Simply fill in the "To," "Subject," and "Body" fields, and the widget will generate the link for you. You can further customize the link in the notification sending form.
* To ensure the link opens in the same tab, remove the domain name from the link.
* Utilize the "sid" from email column as the source email address, and the platform will automatically substitute it with the customer's actual email. For instance, this would appear as: `{{RUX10a40xcfeTY49dins}}`.
{% code overflow="wrap" %}
```
// Parameters
/form/settings/notifications/0/?bHN6R2RhdGFud0ZP={%22rows%22:[{%22sid%22:%22{{SID}}%22,%22name%22:%22{{UID}}: {{NAME}}%22}],%22name%22:%22Thank you for using xxx%22,%22emails%22:%22{{RUX10a40xcfeTY49dins}},{{UX140a40xeb3W27bglqv}}%22,%22body%22:%22Hi {{NAME}},
Thank you for using our services!%22,%22should_email%22:true,%22should_include_rows%22:false}&MAZFNvXcgdMg=true
```
{% endcode %}
### Step 3: Repeating the Process for Additional Emails
Once the first email is added, repeat these steps to add second and third emails. However, make the following adjustments:
* **Parent**: Choose the previous step.
* **Parameters**: \[Your email sending link]
* For scheduled emails, you can use variables like {{3DAY}} in the "Date to Send Email" field to send the email three days from the current date.
{% code overflow="wrap" %}
```
// Parameters
/form/settings/notifications/0/?bHN6R2RhdGFud0ZP={%22rows%22:[{%22sid%22:%22{{SID}}%22,%22name%22:%22{{UID}}: {{NAME}}%22}],%22name%22:%22Thank you for using xxx%22,%22emails%22:%22{{RUX10a40xcfeTY49dins}},{{UX140a40xeb3W27bglqv}}%22,%22body%22:%22Hi {{NAME}},
Thank you for using our services!%22,%22should_email%22:true,%22should_include_rows%22:false,%22date_to_send_email%22:%22{{3DAY}}%22}&MAZFNvXcgdMg=true
```
{% endcode %}
### Closing Up
With the email sending process workflow set up, it's advisable to save the configurations for future use. To do this, follow these steps:
1. Click on the **Actions** button of the "Follow-up Emails" section.
2. Choose "**Save as Table Default.**"
### Executing the Workflow
To initiate the email follow-up process, simply click the "Send" button for each step. The system will schedule email sending based on the time frame you've designed.
By following these steps, you can automate and streamline your follow-up email process within Labii CRM.
---
# Agent Instructions
This documentation is published with GitBook. GitBook is the documentation platform designed so that both humans and AI agents can read, navigate, and reason over technical content effectively. Learn more at gitbook.com.
## Querying This Documentation
If you need additional information that is not directly available in this page, you can query the documentation dynamically by asking a question.
Perform an HTTP GET request on the current page URL with the `ask` query parameter, and the optional `goal` query parameter:
```
GET https://docs.labii.com/applications/process-management/email-follow-up-process-in-crm.md?ask=&goal=
```
`ask` is the immediate question: it should be specific, self-contained, and written in natural language.
`goal` is optional and describes the broader end goal you are ultimately trying to accomplish on behalf of the user. GitBook uses it to tailor the answer towards what is most useful for that goal.
The response will contain a direct answer to the question and relevant excerpts and sources from the documentation.
Use this mechanism when the answer is not explicitly present in the current page, you need clarification or additional context, or you want to retrieve related documentation sections.